Showing posts with label Beauty Tips. Show all posts

Monday, April 3, 2023

Foraging Wild Purple Violet Flowers


Next on our list of foraging is wild purple violet flowers.💜💜💜💜💜

They can help support restful sleep and is a nice addition to a gentle sleep blend. Violet is moist and cooling and the leaves ease inflammation, and when used externally, soothe skin irritations and swelling. It has an affinity for the lymphatic system and can promote healthy lymphatic function. And packed with vitamins every inch of this plant is edible and wonderful for you!


A Violet Tincture can be used as a respiratory remedy, blood cleanser, lymphatic stimulant to aid the body in spring detoxification and also support a restful sleep. I'm not surprised these tender flowers also can help to ease an emotional heart ache, softening the sharp pain...Another name for violet is "hearts-ease" and they've been used for thousands of years to aid the emotional and physical heart...

Wild violets (not to be confused with African violets) are the tiniest, most delicate, light purple flowers 
and they’re edible! 

CAUTION: If you harvest violets for food, make sure they are from an area never sprayed or treated!

Packed with antioxidants and Vitamin C, wild violets can be found in cooler spring climates, They are delicious addition to salads, an eye catching garnish on desserts, and make a beautiful, purple syrup that can be added to beverages, ice cream, cake frosting, cheesecake or just poured over pancakes and waffles! For creative chefs and wild foragers alike, a wild violet simple syrup is a truly special seasonal treat! 

TIP: You'll want to save this recipe to use when your violets make their annual entrance!

Making wild violet simple syrup is super easy. It takes a full 24 hours, but 99% of that time is for steeping the flowers. The little bit of hands-on time is as easy as making herbal tea!


Wild Violet Simple Syrup
Ingredients
4 cups of wild violets
2 cups boiling water
2 cups organic evaporated cane juice
3 to 4 drops of lemon juice

Supplies needed:
a quart or 1/2 gallon-size glass jar
a wooden spoon
a large fine-mesh sieve
a whisk

Instructions:
Collect wild violets.
You really only need the flower petals. A few stray stems and receptacles (base of the flower) will not affect the flavor of the syrup.

Pour boiling water over the wild violets.
The ratio of flowers to water is 2:1. Example: 4 cups of wild violets to 2 cups of boiling water. The water will  immediately begin to change color!

Use a wooden spoon to smash the violets down into the water. The petals will shrink in size considerably, so make sure they’re all submerged.

Steep the violets for 24 hours.
Place a lid on your jar and let the violets steep for 24 hours.  The pigment begins to come out of the petals rather quickly, but don't  skip the full 24-hour steeping time, though. The longer the petals steep, the more purple pigment is drawn out, and the more depth of color the finished wild violet syrup will have.

Strain.
After 24 hours, pour the violet “tea” into a fine-mesh strainer. You should still have 2 cups of liquid.

Press out all the “tea”.
Using clean fingers, press all of the blueish-purple “tea” out of the petals. The spent petals can be added to your compost pile.

Note how blue the wild violet “tea” is, not very purple at all. That will change later with lemon juice.

Combine the wild violet “tea” with 2 cups of organic evaporated cane juice.

Place it on the stove on low-medium heat. Whisk the sugar and “tea” together while the mixture heats. DO NOT BOIL!

If purple syrup is what you want, it is crucial that you keep an eye on your syrup and don’t allow it to boil. Boiling the liquid destroys the beautiful color. The sugar will dissolve in the warm liquid without boiling.

Add 3 to 4 drops of lemon juice.
As soon as the cane sugar is completely dissolved, remove the syrup from the heat and add 3 or 4 drops of lemon juice to it. This causes a chemical reaction that makes the color of the liquid go from blue to a bright purple.

The more lemon juice you add, the lighter the color of the wild violet simple syrup.

Using a funnel, pour the finished wild violet syrup into a bottle or jar. 

You can store your wild violet simple syrup in the fridge for up to 2 weeks — if it lasts that long! Pour it over waffles or pancakes, add it to sparkling water for a bubbly floral beverage, flavor your kombucha with it, or add it to a mixed beverage!

CAUTIONS: 
Violets actually have many look-alikes, many of which are inedible or poisonous, so only harvest them when the flowers are present and you are 100% sure that you have a violet. Please reference a reliable plant identification guide when gathering any wild edible or medicinal herb.

Read more…

Sunday, February 28, 2016

DIY Poo Poo Spray Poo Pourri Recipes Printable Labels


It’s the film of oil covering the surface of the water that prevents odors from escaping the bowl. 
  • Use distilled water (or bottled water) as the base of your Poo Pourri recipe for best results. Of course, tap water works too, but it contains other minerals that could ever-so-slightly affect your recipe. Fortunately, distilled water is budget-friendly… a gallon jug is just 99 cents at most grocery stores.
  • Use rubbing alcohol (or witch hazel or vodka) as a stabilizer. It turns the liquid into a white, milky substance — much like the original Poo Pourri. It also helps the water and oils mix better, although you still need to shake before each use.
  • For the best results, use 100% natural Essential Oils, rather than synthetic blends that are made in a lab.
  • The exact number of drops and which Essential Oils you use is completely up to you. Each variable you change will change the scent and its strength to some degree. Experiment and find the combination you like best. Below I share my favorites, plus some popular scent combinations from the original Poo Pourri sprays.
  • If you want to be able to see the oil barrier of protection in the toilet bowl itself, you can add a few drops of blue food coloring to your DIY Poo Pourri recipe.
  • Ideally, you should store your homemade Poo Pourri spray in a small glass spray bottles — because Essential Oils break down and become less effective when exposed to light. However, I’ll be honest, I’m using small plastic spray bottles (like the original Poo Pourri comes in). I like the ones with a trigger sprayer best because they hang nicely on the side of the toilet paper holder that I have on the back each toilet in our home.
Recipe 1

  1. Find a clean 2 oz (or 4 oz) spray bottle.
  2. Combine 10 (or 20) drops of Essential Oils and 1 (or 2) tablespoons of Rubbing Alcohol in a small spray bottle first.
  3. Shake to mix thoroughly.
  4. Next, add water to the spray bottle, enough to almost reach the rim.


************************
Recipe 2

Combine in a 2oz Glass Spray Bottle,
1.75 oz Distilled Water,
15 drops Lemon EO, 
5 drops of Bergamot, 
10 drops Orange EO, 
1/2 teaspoon of Vegetable Glycerin.


Note** EO stands for Essential Oils


***********************************************


******************************************************

You can use any mixture of EO's just note how many drops of each in the above recipes as a general rule of thumb.

Free printable labels just right click and save image then print from saved image.


Read more…

Tuesday, March 10, 2015

DIY Lip Balm Stain


Solve chapped winter lips with a DIY balm stain. Mix a few pinches of unsweetened Kool Aid powder with Vaseline or coconut oil and white sugar to your taste. Apply to lips for a sweet flush of color that lasts!


Read more…

Thursday, February 12, 2015

Uses for Witch Hazel


Witch hazel is mainly used externally on sores, bruises, and swelling. The main constituents of the extract include tannin, gallic acid, catechins, proanthocyanins, flavonoids (kaempferol, quercetin), essential oil (carvacrol, eugenol, hexenol), choline, saponins, and bitters. Distilled witch hazel sold in drug stores and pharmacies typically contains no tannin."

  • Swelling – Witch Hazel takes the swelling out of any injury. I use it on bruises to help them heal faster, if you use witch hazel soon enough after an injury, sometimes you won’t even get a bruise.
  • Facial Toner – It is a wonderful skin toner… I can NOT stand to go without it! It keeps keeps my face clear of any breakouts – Period. Love love love it!
  • Makeup Remover – Mix equal parts Witch Hazel and Olive Oil for makeup remover.
  • Natural Bug Repellent – 1/2 cup of witch hazel, 1/2 cup water, add 20 drops of vanilla for natural bug repellent. Spray or rub on skin.
1. Natural Astringent
Probably the most famous way witch hazel is used is as a natural astringent. High concentrations of tannins in witch hazel make it an excellent astringent which means it has the ability to remove excess oil from skin and shrink down pores.  Health-wise, those who are exposed to lots of environmental pollutants may apply witch hazel to the face in order to reduce the amount of contaminants that enter pores and, consequently, the amount and severity of blemishes.  Also, because astringents remove excess oil, regular use of witch hazel may further prevent blemishes, especially black heads which result from dried sebum build-up in pores.

2. Fade Bruises and Blemishes
Witch hazel may also be used to treat blemishes already present on the face or other areas of the body.  Apply witch hazel with a cotton ball or cosmetic pad to reduce irritation and appearance of acne or other inflammatory skin conditions.  Witch hazel applied to bruises can also help to fade discoloration and speed up the healing process of any underlying damage.

3. Brighten Around Eyes
The ability of witch hazel to tighten skin and reduce inflammation makes this an ideal natural remedy for treating discoloration and puffiness under and around eyes and is one of the most popular uses for witch hazel.  Just make sure not to get any of this natural astringent on the eyes themselves as it will result in significant pain and lingering discomfort from dryness.

4. Shrink Swollen Veins
Soak soft terry cloth in witch hazel and lay over skin affected by varicose veins to temporarily reduce swelling and pain.  Also, remember to prop up the areas to be treated as high as possible.  This will decrease blood pressure in swollen veins and maximize the effectiveness of your treatment.

5. Stop Bleeding
Witch hazel naturally tightens skin and promotes faster healing.  Apply organic witch hazel  to minor cuts and scrapes to stop bleeding.  Store-bought witch hazel also often contains isoproply alcohol which disinfects, making it a popular choice for cleansing wounds before bandaging.

6. Post Hair-removal
For both men and women, witch hazel is a great follow-up to shaving any part of the body.  Not only will it stop bleeding from nicks or cuts, anti-inflammatory witch hazel can also work to prevent razor burn.  Furthermore, those who employ hot wax treatments for hair-removal may also apply witch hazel as an anti-inflammatory post-waxing or use it to stop bleeding from damaged hair follicles.


7. Hemorrhoid Relief
Witch hazel is great for easing the pain, itching, swelling, and bleeding of hemorrhoids.  In fact, it’s a common ingredient used in many commercial hemorrhoid creams.  Just mix witch hazel with a carrier like Aloe Vera gel and apply to affected areas for fast relief.


8. Ease a Sore Throat
Due to its astringent properties, an herbal tea of witch hazel (not the store-bought kind which almost always contains isopropyl alcohol) can help to ease the discomfort of a sore throat.  Gargle with witch hazel tea to reduce swelling, dry up excess mucus, and ease pain caused by laryngitis, sinusitis, tonsillitis, or other throat maladies.

9. Treat Damaged Gums
A witch hazel mouth rinse (again, don’t use witch hazel that contains isopropyl alcohol) can help to reduce pain and swelling of irritated or infected gums.  Witch hazel can be used stop minor bleeding of the gums and mouth.  Try a teaspoon of witch hazel tea with one drop each clove and myrrh oil to safely relieve teething pain for infants.  The same treatment may also be used to soothe pain caused by emerging wisdom teeth or after oral surgery to reduce discomfort and inflammation.

10. Dry Up Swimmer’s Ear
Otitus externa – commonly known as ‘Swimmer’s Ear’ – is caused by microbial infection of the ear canal.  Use an eye dropper to insert several drops of witch hazel into each ear to dry up pus, clear away excess oil, and break up wax and debris that may be clogging the ear canal.  Allow ears to drain then clean gently with a cotton swab or cosmetic pad.  Follow up with a natural anti-microbial like basil oil, apple cider vinegar, or tea tree oil.

11. Soothe Diaper Rash
Anti-inflammatory properties of witch hazel make it an effective and safe remedy for soothing pain from diaper rash.  Regular application will also assist in healing damaged skin faster, further reducing your baby’s discomfort.

12. Cool Down Sunburn
Mix some witch hazel in with your Aloe Vera gel the next time you need to treat a sunburn.  The anti-inflammatory power of this incredible plant extract will aid your skin in healing while it and the Aloe help to cool the burn.  This treatment can also help to prevent skin from peeling in the days following a bad burn.

13. Neutralize Contact Dermatitis
Because of its drying and anti-itch power, witch hazel can also be used to counter the effects of skin-irritating plant compounds like urushiol, the sap oil contained in poison ivy, poison oak, and poison sumac that causes contact dermatitis in about 85% of adults who come in contact with it.

14. Bug Bites and Stings
Just as witch hazel can be used to ease pain and itching from poison ivy and its cousins, the same works for bug bites and stings.  Yet another reason to carry a small bottle of this awesome remedy with you the next time you plan to spend a day outdoors!

15. Soothe and heal diaper rash
If your baby's rash isn't healing quick enough, apply witch hazel solution (Dickinson's is good) with a cotton ball and you should see immediate improvement to your baby's bottom.

Read more…

Friday, January 23, 2015

Facts on RAW Honey and Cinnamon

Facts on RAW Honey and Cinnamon:


It is found that a mix of honey and cinnamon CURES most diseases. Honey is produced in most of the countries of the world. Scientists of today also note honey as very effective medicine for all kinds of diseases. Honey can be used without side effects which is also a plus.
HEART DISEASES: Make a paste of honey and cinnamon powder, put it on toast instead of jelly and jam and eat it regularly for breakfast. It reduces the cholesterol and could potentially save one from heart attack. Also, even if you have already had an attack studies show you could be kept miles away from the next attack. Regular use of cinnamon honey strengthens the heart beat. In America and Canada, various nursing homes have treated patients successfully and have found that as one ages the arteries and veins lose their flexibility and get clogged; honey and cinnamon revitalize the arteries and the veins.
ARTHRITIS: Arthritis patients can benefit by taking one cup of warm water with two tablespoons of honey and one small teaspoon of cinnamon powder. When taken daily even chronic arthritis can be cured. In a recent research conducted at the Copenhagen University, it was found that when the doctors treated their patients with a mixture of one tablespoon Honey and half teaspoon Cinnamon powder before breakfast, they found that within a week (out of the 200 people so treated) practically 73 patients were totally relieved of pain -- and within a month, most all the patients who could not walk or move around because of arthritis now started walking without pain.
BLADDER INFECTIONS: Take two tablespoons of cinnamon powder and one teaspoon of honey in a glass of lukewarm water and drink it. It destroys the germs in the bladder....who knew?
CHOLESTEROL: Two tablespoons of honey and three teaspoons of Cinnamon Powder mixed in 16 ounces of tea water given to a cholesterol patient was found to reduce the level of cholesterol in the blood by 10 percent within two hours. As mentioned for arthritic patients, when taken three times a day, any chronic cholesterol-could be cured. According to information received in the said Journal, pure honey taken with food daily relieves complaints of cholesterol.
COLDS: Those suffering from common or severe colds should take one tablespoon lukewarm honey with 1/4 spoon cinnamon powder daily for three days. This process will cure most chronic cough, cold, and, clear the sinuses, and it's delicious too!
UPSET STOMACH: Honey taken with cinnamon powder cures stomach ache and also is said to clear stomach ulcers from its root.
GAS: According to the studies done in India and Japan, it is revealed that when Honey is taken with cinnamon powder the stomach is relieved of gas.
IMMUNE SYSTEM: Daily use of honey and cinnamon powder strengthens the immune system and protects the body from bacterial and viral attacks. Scientists have found that honey has various vitamins and iron in large amounts. Constant use of Honey strengthens the white blood corpuscles (where DNA is contained) to fight bacterial and viral diseases.
INDIGESTION: Cinnamon powder sprinkled on two tablespoons of honey taken before food is eaten relieves acidity and digests the heaviest of meals.
INFLUENZA: A scientist in Spain has proved that honey contains a natural 'Ingredient' which kills the influenza germs and saves the patient from flu.
LONGEVITY: Tea made with honey and cinnamon powder, when taken regularly, arrests the ravages of old age. Use four teaspoons of honey, one teaspoon of cinnamon powder, and three cups of boiling water to make a tea.(add honey when water is lukewarm) Drink 1/4 cup, three to four times a day. It keeps the skin fresh and soft and arrests old age. Life spans increase and even a 100 year old will start performing the chores of a 20-year-old.
RASPY OR SORE THROAT: When throat has a tickle or is raspy, take one tablespoon of honey and sip until gone. Repeat every three hours until throat is without symptoms.
PIMPLES: Three tablespoons of honey and one teaspoon of cinnamon powder paste. Apply this paste on the pimples before sleeping and wash it off the next morning with warm water. When done daily for two weeks, it removes all pimples from the root.
SKIN INFECTIONS:Applying honey and cinnamon powder in equal parts on the affected parts cures eczema, ringworm and all types of skin Infections.
WEIGHT LOSS:Daily in the morning one half hour before breakfast and on an empty stomach, and at night before sleeping, drink honey and cinnamon powder boiled in one cup of water. When taken regularly, it reduces the weight of even the most obese person. Also, drinking this mixture regularly does not allow the fat to accumulate in the body even though the person may eat a high calorie diet.
CANCER: Recent research in Japan and Australia has revealed that advanced cancer of the stomach and bones have been cured successfully. Patients suffering from these kinds of cancer should daily take one tablespoon of honey with one teaspoon of cinnamon powder three times a day for one month.
FATIGUE: Recent studies have shown that the sugar content of honey is more helpful rather than being detrimental to the strength of the body. Senior citizens who take honey and cinnamon powder in equal parts are more alert and flexible. Dr. Milton, who has done research, says that a half tablespoon of honey taken in a glass of water and sprinkled with cinnamon powder, even when the vitality of the body starts to decrease, when taken daily after brushing and in the afternoon at about 3:00 P.M., the vitality of the body increases within a week.
BAD BREATH: People of South America, gargle with one teaspoon of honey and cinnamon powder mixed in warm water first thing in the morning so their breath stays fresh throughout the day.
HEARING LOSS: Daily morning and night honey and cinnamon powder, taken in equal parts restores hearing.

Read more…

Tuesday, June 18, 2013

Listerine Foot Bath

Listerine Foot Bath

 Listerine is the BEST way to get your feet ready for summer. Sounds crazy but it works!

Mix 1/4 c Listerine (any kind but I like the blue),
1/4 c vinegar
1/2 c of warm water.

Soak feet for 10 - 20 minutes and when you take them out the dead skin will practically wipe off!

Read more…

Wednesday, June 5, 2013

Tanning Tips 101 (Sun & Bed)


  1. Make sure you exfoliate regularly and before tanning to avoid build up as several layers of tan can result in an uneven result. (Exfoliate your skin to remove oils and fragrances and to expose the top layer of skin. Shave before rather than after tanning to remove dead skin cells so you tan evenly.)
  2.  If you’re waxing or shaving before tanning, make sure you do it more than 24 hours before your tan.
  3. Apply plenty of moisturiser the night before to get your skin as silky as possible. The most common cause of a patchy tan is dry skin, so it’s crucial to moisturise problem areas (wrists and hands, elbows, knees, ankles and feet) immediately prior to self tan application.

Read more…

Friday, May 31, 2013

Dark Elbows or Knees


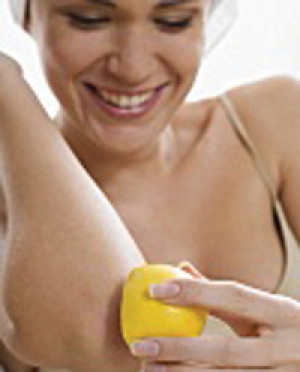
It is so easy to cure them with a very simple procedure. You could either apply some lime/lemon juice or some curd to lighten these dark patches.

Mint Application
Mint contains certain essential oils that makes mint a potent breath freshener. It also has antiseptic and anti- inflammatory compounds whose essential oils helps in synthesis of white blood cells and collagen in the body. It also functions to clean away the scar tissues from within.


Combination of mint and lemon oil helps make skin fairer and is good bleach for the skin. Boil ½ cup of water with a handful of mint leaves. Squeeze half lemon juice into the mint water. Soak a cotton ball in the mixture and apply it on your knees and elbows. After 15-20 minutes wash it with warm water.


Lemon And Sugar Scrub
Lemon has super healing properties that heal the scars and bleaches the skin. Sugar granules combined with lemon exfoliates the dry dead skin and aids to form a new softer skin layer.

Before taking a bath rub a slice of lemon with sugar crystals in circular motion till the sugar crystals dissolves.


Scrubbing With A Towel
Mix ½ teaspoon of lime juice and 1 teaspoon of coconut oil together and apply it evenly on the affected area. Leave it on for 15-20 minutes, then scrub it by using a towel soaked in hot water. Coconut is rich in essential fats and Vitamin E that nourishes the skin and makes it soft and supple. If regular scrubbing is done the skin can become more fairer within few days.


Yogurt And Vinegar
Yogurt and vinegar contain lactic acid and acetic acid respectively which helps in lightening skin color. Darkened knees and elbows , scars and pigmentation can be effectively treated with a combination of yogurt and vinegar. Apply it on the affected area and let it sit for approximately 20 minutes and then wash it off with water.


Magic Of Garlic And Onion
Cut a clove of garlic and an onion and rub it directly on your elbows and knees for approx. 10 minutes and then wash it dry. Garlic and onions are herbaceous plant with numerous minerals and volatile oils. They are good remedy to lighten up darkened body
parts especially elbows and knees.


Gram Flour And Curd Pack
Gram flour contains a large number of vitamins , minerals ,and proteins, that acts like a natural exfoliant. Its whitening properties aids to eliminate pigmentation and blemishes.


Apply a smooth paste of curd and gram flour on the affected area.After it dries, scrub it off in circular motions and wash it off with water.


Honey And Aloe Vera Mask
Honey is sticky in texture and possesses large number of phytochemicals , enzymes and organic acids. It acts as a natural
moisturizer for your skin whereas saponins and lignins present in aloe plant go deep in the skin and clean it effectively.
Apply Aloe Vera gel and honey on the knees and elbows and wash it after half an hour.


Lubrication After Shower
Mustard oil has anti bacterial oil with linoleic acid, oleic acid and erucic acid. These volatile acids helps to lubricate the skin, maintain its color and protect it thoroughly. It also helps to retain its  melanin pigment. It is better to rub mustard oil on the affected areas right after taking a bath for best results. Let it be for 15 minutes then wash it with warm water.

Read more…

Wednesday, May 29, 2013

Homemade Self Tanners


As with any tanning lotion, when you prepare a homemade self-tanning recipe, you should spot check a patch of your skin first to check for color and for any allergic reaction. Wear plastic gloves or wash hands every few minutes to avoid stains on your hands. Be sparing with the self-tanner around the knees, elbows, feet and ankles, where skin soaks up more color, or apply a little moisturizer there first.


Pre-tanning Scrub
To make your self tan last longer, prepare this homemade recipe for a pre-tanning scrub. Blend two tablespoons each of baking soda and manuka honey with one tablespoon of organic virgin oil. Scrub your skin with this formulation before you apply a commercial or homemade self-tanning product. Inexpensive, natural and gentle, this pre-tanning formulation removes dead and damaged skin cells without damaging to your skin. The antibacterial property of the honey also helps the lotion to keep well.
TEA

Pour ¾ cup of boiling, pure water over 3 teabags and steep for 5 to 10 minutes. Remove the teabags and put ¼ cup of the tea, ¼ cup lanolin and ¼ cup sesame oil into a blender. Blend these ingredients together at slow speed, adding the rest of the tea slowly. Apply this sparingly to your skin.

DHA

Mix together a teaspoon of water with a pinch of hyaluronic acid and 10 to 12 granules of DHA. Stir until the DHA powder is dissolved, and then spread the blend evenly over your skin, massaging it in. This amount is enough for the face. You can substitute the teaspoon of water with a teaspoon of a water-based moisturizing lotion.
COCOA POWDER

One of the simplest homemade self-tanning recipes makes use of regular baking cocoa. Simply mix ¼ cup of cocoa with a natural white lotion, and spread it evenly over your face. When you apply this lotion it does feel rather sticky. While you won't see the results as quickly as you would with a store-bought self tanning lotions, the final result will be smooth, natural looking and not at all "orange-y."

Read more…

Disclaimer

⚠ Disclaimer: We do not own and do not claim to own all the images and some content appearing on this website or Facebook page. The images and few contents belong to their respective owners, who have copyright over them. The images and some contents are taken from various different sources and we credit them on the end of every content if we were able to locate original website or recipes and images. If you feel that any image violates your copyright, please write to venus12277@gmail.com to have it taken down.